
Epomaker RT100 Manual: A Comprehensive Guide
This guide details the Epomaker RT100’s setup, connectivity, customization, and troubleshooting, offering a complete resource for optimal keyboard performance and enjoyment․
The Epomaker RT100 is a versatile mechanical keyboard designed for gamers, programmers, and everyday users alike․ Featuring a unique 97-key layout and a vibrant mini display screen, it blends functionality with aesthetic appeal․ This keyboard offers both wired and wireless connectivity options – USB-C, Bluetooth 5․0, and 2․4GHz – providing flexibility for various setups․
Its customizable nature, enhanced by dedicated Epomaker software, allows users to remap keys, program macros, and personalize the mini display with images or information․ The integrated rotary knob provides convenient multimedia control, further enhancing the user experience․ This manual will guide you through every aspect of the RT100, ensuring a seamless and enjoyable experience․
Unboxing and Initial Setup
Upon unboxing your Epomaker RT100, verify the package includes the keyboard, a USB-C cable, the 2․4GHz wireless receiver, keycap puller, switch puller, and this user manual․ Before first use, ensure the keyboard is fully charged or connect it via the provided USB-C cable to your computer․
Inspect the keyboard for any physical damage․ If the mini-screen displays abnormally – incorrect information or a blurred image – gently but firmly push the display into the keyboard, adjusting the angle for a secure connection․ Download and install the Epomaker software for full customization options․
Connectivity Options: Wired and Wireless
The Epomaker RT100 offers versatile connectivity, supporting wired USB-C, Bluetooth, and 2․4GHz wireless modes․ Switching between modes allows for adaptable use across various devices and scenarios․ For a stable, low-latency connection, utilize the included USB-C cable․ Wireless options provide freedom and flexibility․
Bluetooth pairing enables connection to smartphones, tablets, and laptops, while the 2․4GHz receiver offers a reliable wireless experience for desktops․ Explore each method to determine the best fit for your needs, ensuring a seamless typing experience․
Connecting via USB-C (Wired Mode)
To connect the Epomaker RT100 via USB-C, simply plug the provided USB-C cable into the keyboard’s USB-C port and the other end into a compatible USB port on your computer․ The keyboard should be instantly recognized by your operating system without requiring additional drivers․
This wired connection provides a stable and reliable link, ideal for gaming or tasks demanding precise input․ Ensure the cable is securely connected for uninterrupted operation․ Wired mode bypasses potential wireless interference, offering consistent performance․
Bluetooth Pairing Instructions
To pair the Epomaker RT100 via Bluetooth, first, ensure the keyboard is powered on․ Press and hold the Bluetooth pairing button (refer to the keyboard layout diagram) until the indicator light begins to flash․ On your computer or device, navigate to the Bluetooth settings and scan for available devices․
Select “Epomaker RT100” from the list of detected devices․ You may be prompted to enter a pairing code; if so, try “0000”․ Once successfully paired, the indicator light will become solid․ Enjoy a wireless connection!
2․4GHz Wireless Connection Guide
To connect the Epomaker RT100 using the 2․4GHz wireless receiver, insert the USB receiver into an available port on your computer․ Power on the keyboard and press the designated 2․4GHz pairing button (consult the keyboard layout)․ The indicator light will flash, signifying pairing mode․
The keyboard should automatically connect to the receiver․ A solid indicator light confirms a successful connection․ This mode offers a stable, low-latency wireless experience, ideal for gaming․ Ensure the receiver is within a reasonable range for optimal performance․

Understanding the Mini Display Screen
The Epomaker RT100 features a customizable mini display screen, enhancing its functionality beyond a standard keyboard․ This screen can display various information, including system details, custom images, or even animated GIFs․ Accessing and modifying the display content requires the Epomaker software․
The screen adds a unique aesthetic and provides at-a-glance information․ Users can personalize the display to reflect their preferences, creating a truly customized keyboard experience․ Explore the software options to unlock the full potential of this innovative feature․
Troubleshooting Display Issues
If the mini-screen displays abnormally – showing incorrect information, a blurred image, or getting stuck on the wrong language – several steps can resolve the issue․ First, firmly push the mini display into the keyboard, ensuring a secure connection․ Gently adjust the angles slightly; a loose connection is a common cause․
If the problem persists, verify the display settings within the Epomaker software․ A software glitch or incorrect configuration could be the culprit․ Restarting the software or re-flashing the firmware might also be necessary for optimal display function․
Customizing Display Content (Images/Information)
The Epomaker RT100’s mini display offers exciting customization options beyond basic information․ Users can switch displayed content, including images, to personalize their keyboard․ This functionality is primarily managed through the Epomaker software, allowing for easy uploads and selections․
Explore the software’s interface to discover available image formats and size limitations․ Regularly check for software updates, as new features and expanded customization options are frequently added․ Experiment with different images to create a truly unique and visually appealing keyboard setup!
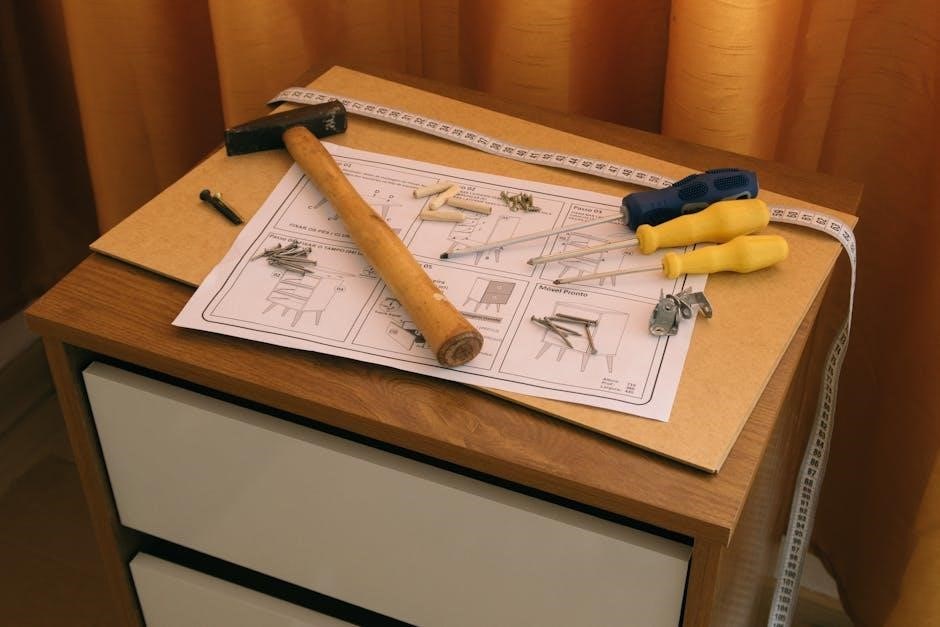
Keycap Removal and Replacement
Replacing keycaps on the Epomaker RT100 is straightforward, allowing for personalization and customization․ A standard keycap puller is recommended to safely remove keycaps without damaging the switches․ Gently align the puller over the keycap and apply even pressure, lifting straight up․
To install new keycaps, align them with the switch stems and press down firmly until securely seated․ Ensure compatibility with the RT100’s switch type before purchasing aftermarket keycaps․ Enjoy experimenting with different profiles and materials!
Functionality of the Rotary Knob
The Epomaker RT100’s rotary knob offers convenient control over multimedia functions․ By default, it adjusts volume, plays/pauses media, and skips tracks with intuitive twists and clicks․ This provides quick access to essential controls without interrupting your workflow․
However, the true power lies in customization! Utilizing the Epomaker software, you can reassign the knob to perform various functions, such as scrolling, zooming, or launching applications, tailoring it to your specific needs and preferences․
Default Multimedia Controls
Out of the box, the Epomaker RT100’s rotary knob is pre-configured for seamless multimedia control․ A simple clockwise rotation increases the system volume, while counter-clockwise decreases it․ A short press of the knob typically toggles play/pause for your current media․
Furthermore, clicking the knob usually advances to the next track, offering immediate control over your audio experience․ These default settings provide instant usability, allowing you to manage your music and videos effortlessly without needing any initial software configuration․

Customizing Knob Functions with Epomaker Software
The Epomaker software unlocks the full potential of the RT100’s rotary knob, allowing for extensive customization․ Users can reassign the knob’s functions beyond default multimedia controls․ Options include volume up/down, play/pause, next/previous track, and even custom keybindings or macro execution․
Through the intuitive software interface, you can tailor the knob’s behavior to perfectly match your workflow․ This flexibility ensures the RT100 adapts to your specific needs, enhancing productivity and providing a truly personalized user experience․
Epomaker Software Overview
The Epomaker software is central to unlocking the RT100’s advanced features․ It provides a user-friendly interface for customizing key remapping, programming macros, and adjusting the rotary knob’s functionality․ Downloading and installing the software is straightforward from the official Epomaker website, ensuring you have the latest version with optimal compatibility․
This powerful tool allows for deep personalization, enabling users to tailor the keyboard’s behavior to their exact preferences․ Explore the software to discover its full range of customization options and elevate your typing experience․
Downloading and Installing the Software
To begin customizing your Epomaker RT100, first download the Epomaker software from the official website․ Navigate to the “Downloads” section and locate the software compatible with your operating system (Windows or macOS)․ Once downloaded, run the installer and follow the on-screen prompts․

Ensure you grant the necessary permissions during installation for the software to function correctly․ After installation, launch the application, and it should automatically detect your connected RT100 keyboard․ A successful connection will allow you to start customizing!
Key Remapping and Macro Programming
The Epomaker software empowers you to personalize your RT100 with extensive key remapping capabilities․ Within the software interface, you can easily assign different functions to any key on the keyboard․ Furthermore, you can create powerful macros – sequences of keystrokes – to automate complex tasks․
Simply record your desired key sequence, save it as a macro, and then assign that macro to a specific key․ This feature is incredibly useful for gamers and professionals alike, boosting efficiency and streamlining workflows․ Explore the software’s intuitive interface to unlock the full potential!

Firmware Updates
Maintaining up-to-date firmware is crucial for optimal RT100 performance and stability․ Regularly check the Epomaker website for new firmware versions designed to enhance functionality and address potential issues․ Before flashing any firmware, carefully read the release notes to understand the changes and improvements․
The flashing process should be performed cautiously, following the software’s instructions precisely․ Interrupting the firmware update can potentially brick your keyboard, so ensure a stable connection and power supply throughout the process․ A successful update guarantees a smooth and reliable typing experience․
Checking for New Firmware Versions
To check for the latest firmware for your Epomaker RT100, visit the official Epomaker website and navigate to the downloads section․ Locate the RT100 model and review the available firmware files․ Pay close attention to the version number and release date to identify the newest update․
Epomaker frequently releases firmware updates to improve performance, fix bugs, and add new features․ Regularly checking for updates ensures your keyboard operates at its best․ Download the latest version and carefully review the included instructions before proceeding with the flashing process․
Flashing Firmware Safely
Before flashing new firmware on your Epomaker RT100, ensure a stable USB-C connection to your computer․ Download the correct firmware file from the official Epomaker website․ Carefully follow the instructions provided with the firmware; interrupting the process can brick your keyboard․
Avoid disconnecting the keyboard during the flashing process․ It’s recommended to close all other applications to minimize potential conflicts․ If the flashing process fails, consult the Epomaker support resources or community forums for assistance before attempting again․

Troubleshooting Common Issues
If your Epomaker RT100 isn’t connecting, first check the power switch and USB-C cable (for wired mode)․ For Bluetooth, ensure it’s paired correctly in your device’s settings․ If the mini display malfunctions – showing incorrect information or a blurred image – firmly reseat the display or slightly adjust its angle․
Consult the Epomaker software for potential driver issues․ If problems persist, visit the Epomaker support website or community forums for solutions and updated troubleshooting guides․
Keyboard Not Connecting
If your Epomaker RT100 fails to connect, initially verify the power switch is activated and the USB-C cable is securely plugged in for wired operation․ When utilizing Bluetooth, confirm the keyboard is correctly paired within your device’s Bluetooth settings․ Ensure the keyboard isn’t already connected to another device, potentially causing a conflict․
Try a different USB port or Bluetooth device to isolate the issue․ Check for driver updates via the Epomaker software․ A restart of both the keyboard and your computer can often resolve connectivity problems․
Mini Display Malfunctions
Should the Epomaker RT100’s mini display exhibit abnormalities – incorrect information, blurred images, or being stuck on the wrong language – attempt a simple reseating․ Firmly push the mini display into the keyboard, or gently adjust its angle to ensure a secure connection․ If the issue persists, access the Epomaker software to verify the display settings and image selection․
A firmware update might resolve display glitches․ If problems continue, consult the official Epomaker support channels for further assistance and potential troubleshooting steps․
Technical Specifications
The Epomaker RT100 is a 97-key mechanical keyboard offering versatile connectivity: USB-C wired, Bluetooth 5․0, and 2․4GHz wireless․ It features a customizable mini display screen for displaying images or information․ The keyboard supports key remapping and macro programming via Epomaker software․ It’s compatible with Windows and macOS․
Power is supplied via a built-in rechargeable battery (capacity unspecified)․ Key switches are hot-swappable, allowing for customization․ The keyboard’s dimensions and weight are not explicitly detailed in readily available documentation․

Cleaning and Maintenance
To maintain your Epomaker RT100, regularly dust the keyboard with a soft, dry cloth․ For deeper cleaning, disconnect the keyboard and use a keycap puller to remove the keycaps․ Clean the keycaps with mild soap and water, ensuring they are completely dry before reattaching․

Avoid using harsh chemicals or abrasive cleaners, as these can damage the keycaps or keyboard surface․ Gently clean the keyboard chassis with a slightly damp cloth․ Periodically check the USB-C port for debris and carefully remove any obstructions․
Safety Precautions
Always disconnect the Epomaker RT100 before cleaning or performing maintenance․ Do not expose the keyboard to extreme temperatures or humidity․ Avoid dropping or subjecting the keyboard to strong impacts, as this may cause damage․
Do not attempt to disassemble the keyboard beyond keycap removal, as this will void the warranty․ Keep the keyboard away from liquids to prevent electrical shock or malfunction․ If the keyboard malfunctions, do not attempt to repair it yourself; contact customer support for assistance․